The story of American and European harness design have distinct lineages, something of each have lasted into todays modern harness, and some things have been forgotten. In both cases, climbers went from using nothing, to wrapping rope around their bellies, all the way to todays array of modern design. The starting point for both are distinct in form, material and use.
Both the American ‘saddle’, and European ‘harness', are worn around the waist and thighs. The waist part, sometimes called a back pad, is sometimes used by itself, and referred to as a ‘belt’.
The term ‘belt’ proceeded ‘saddle’, and describes literally that. A piece of material that ties around the waist. Sometimes made from rope, sometimes leather, and these days more likely a synthetic material.
Shoulder straps come in different shapes and definitions. The Americans refer to them as suspenders (they can’t escape their Cowboy heritage 😆) and are commonly used to stop a heavy chainsaw from pulling the back pad down. Fast forward into the modern era and ‘full body’ or ‘fall arrest’ harnesses call for load rated materials and specific application.
Wether it is a belt, saddle or harness, the point is to secure a strength rated piece of material to the body, then attach a rope system to it, to allow safety while working (or playing) away from the ground. To restrain oneself from falling, while performing tasks at height.
A m e r i c a
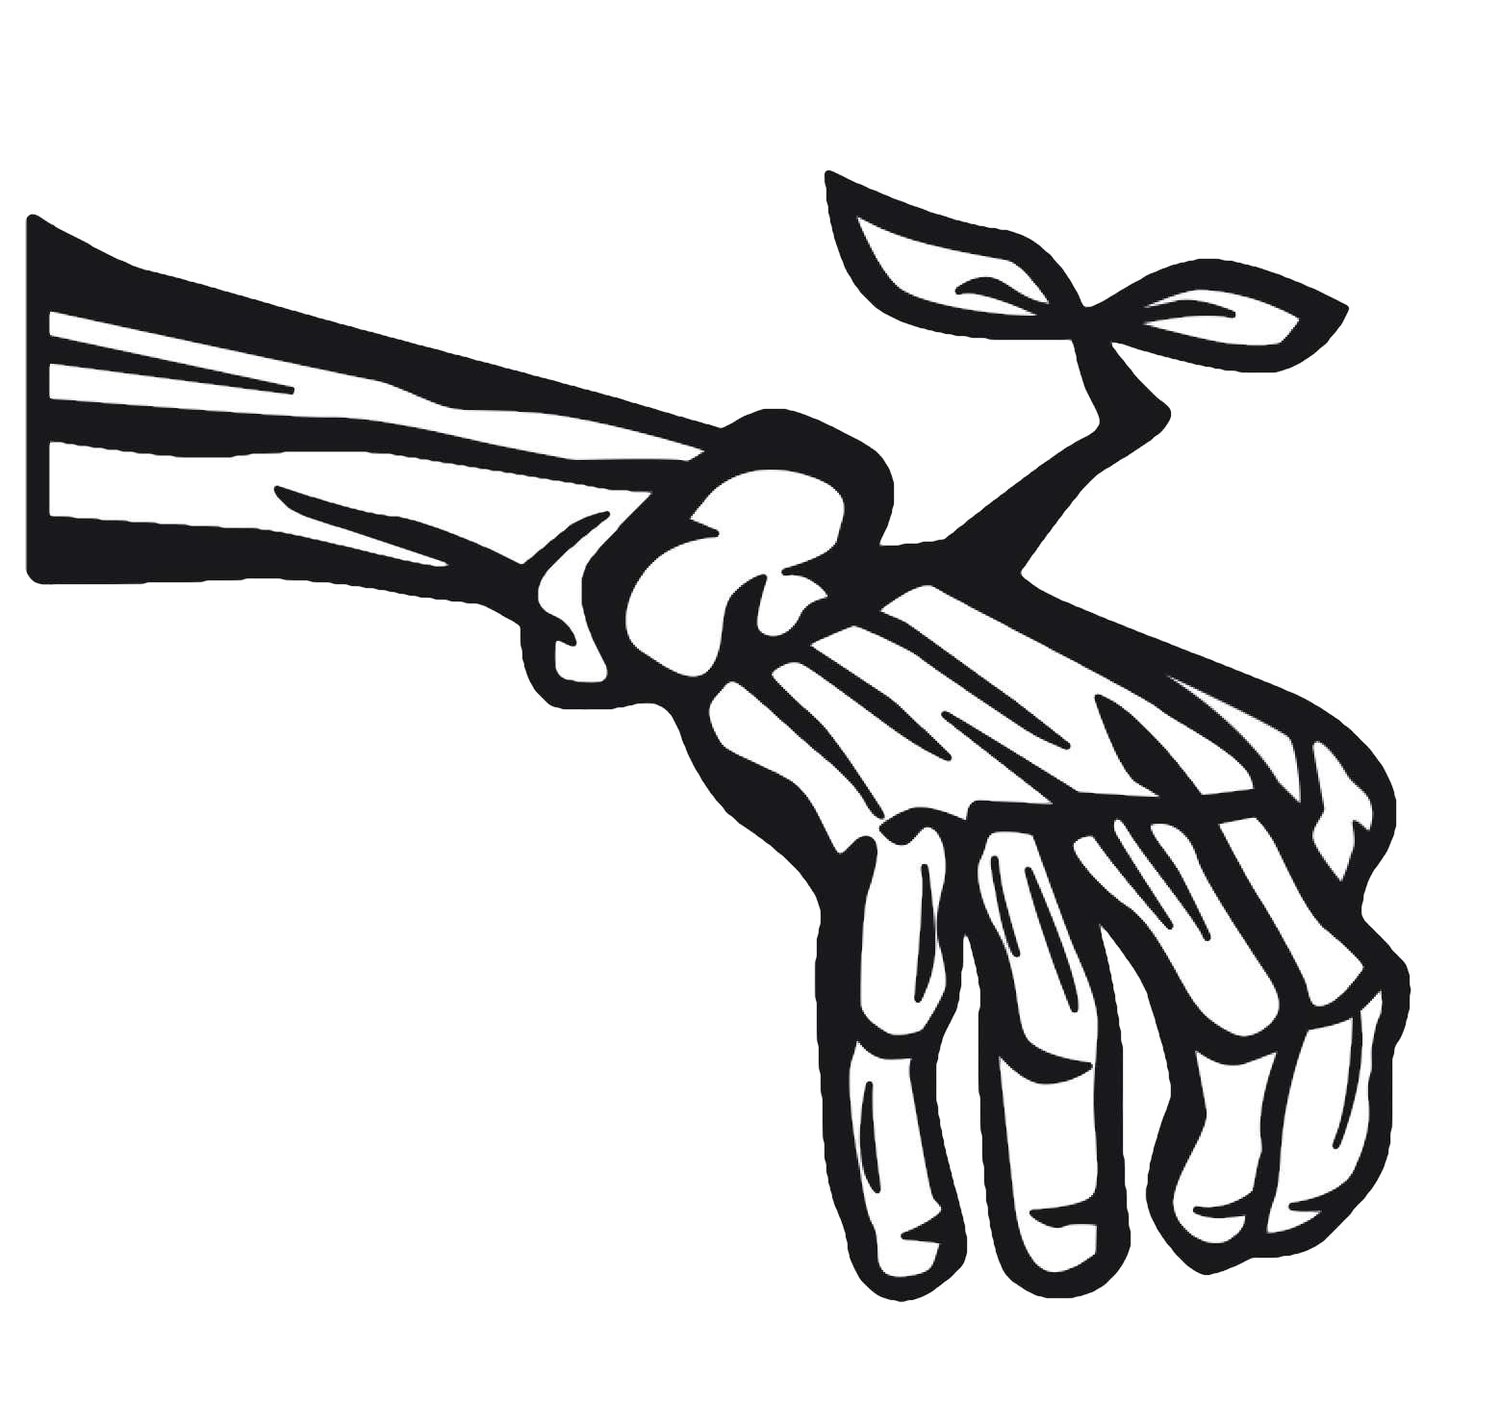
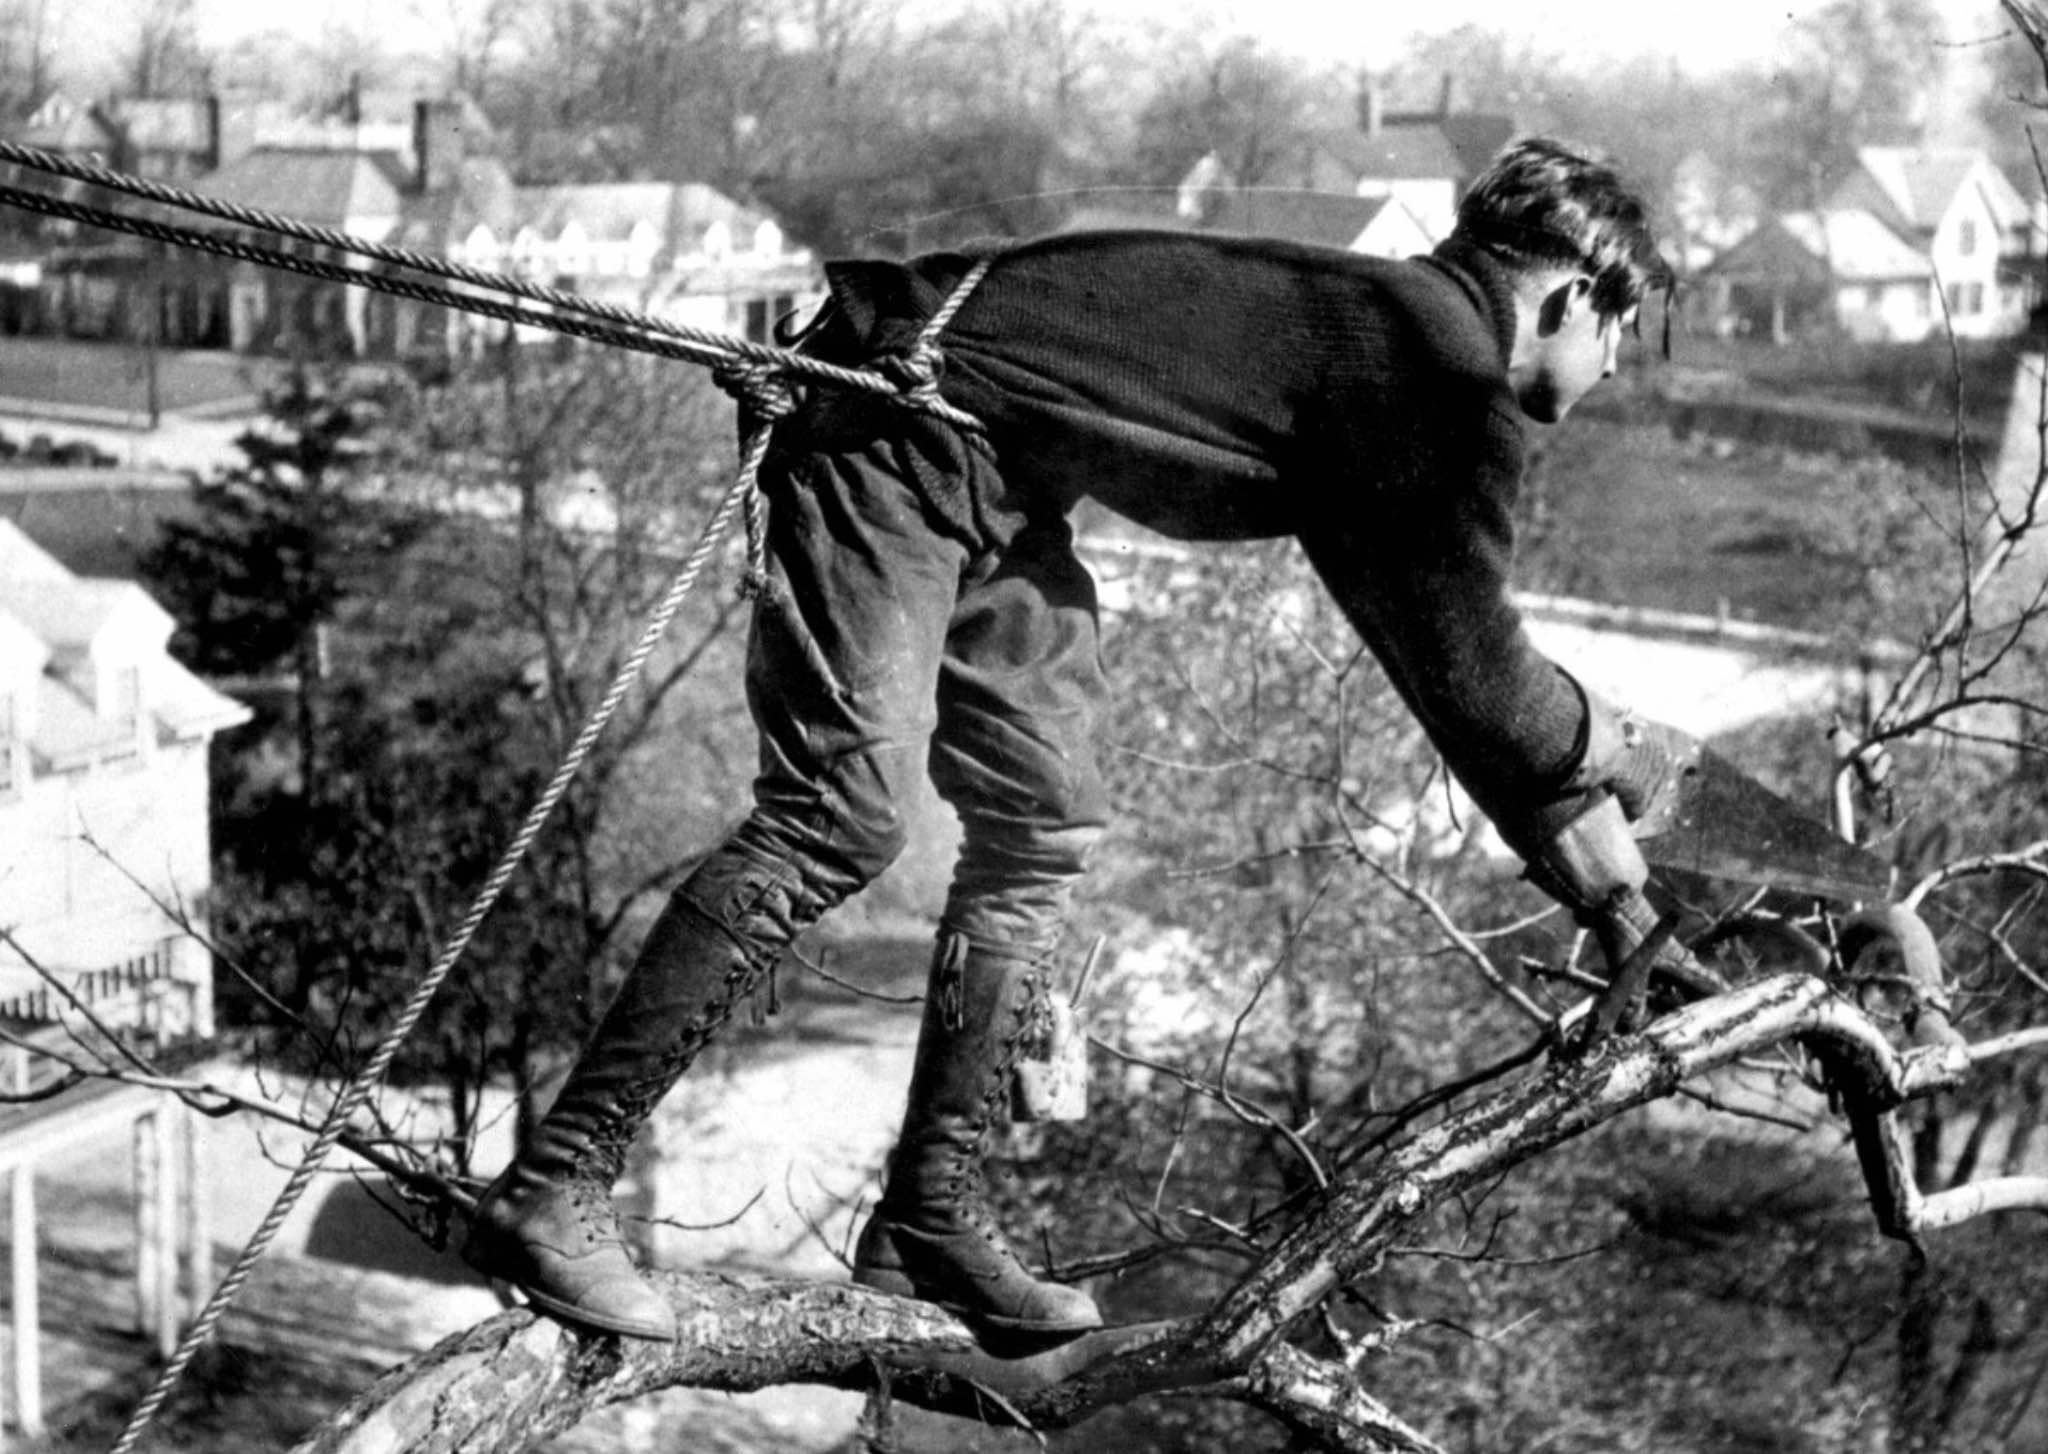
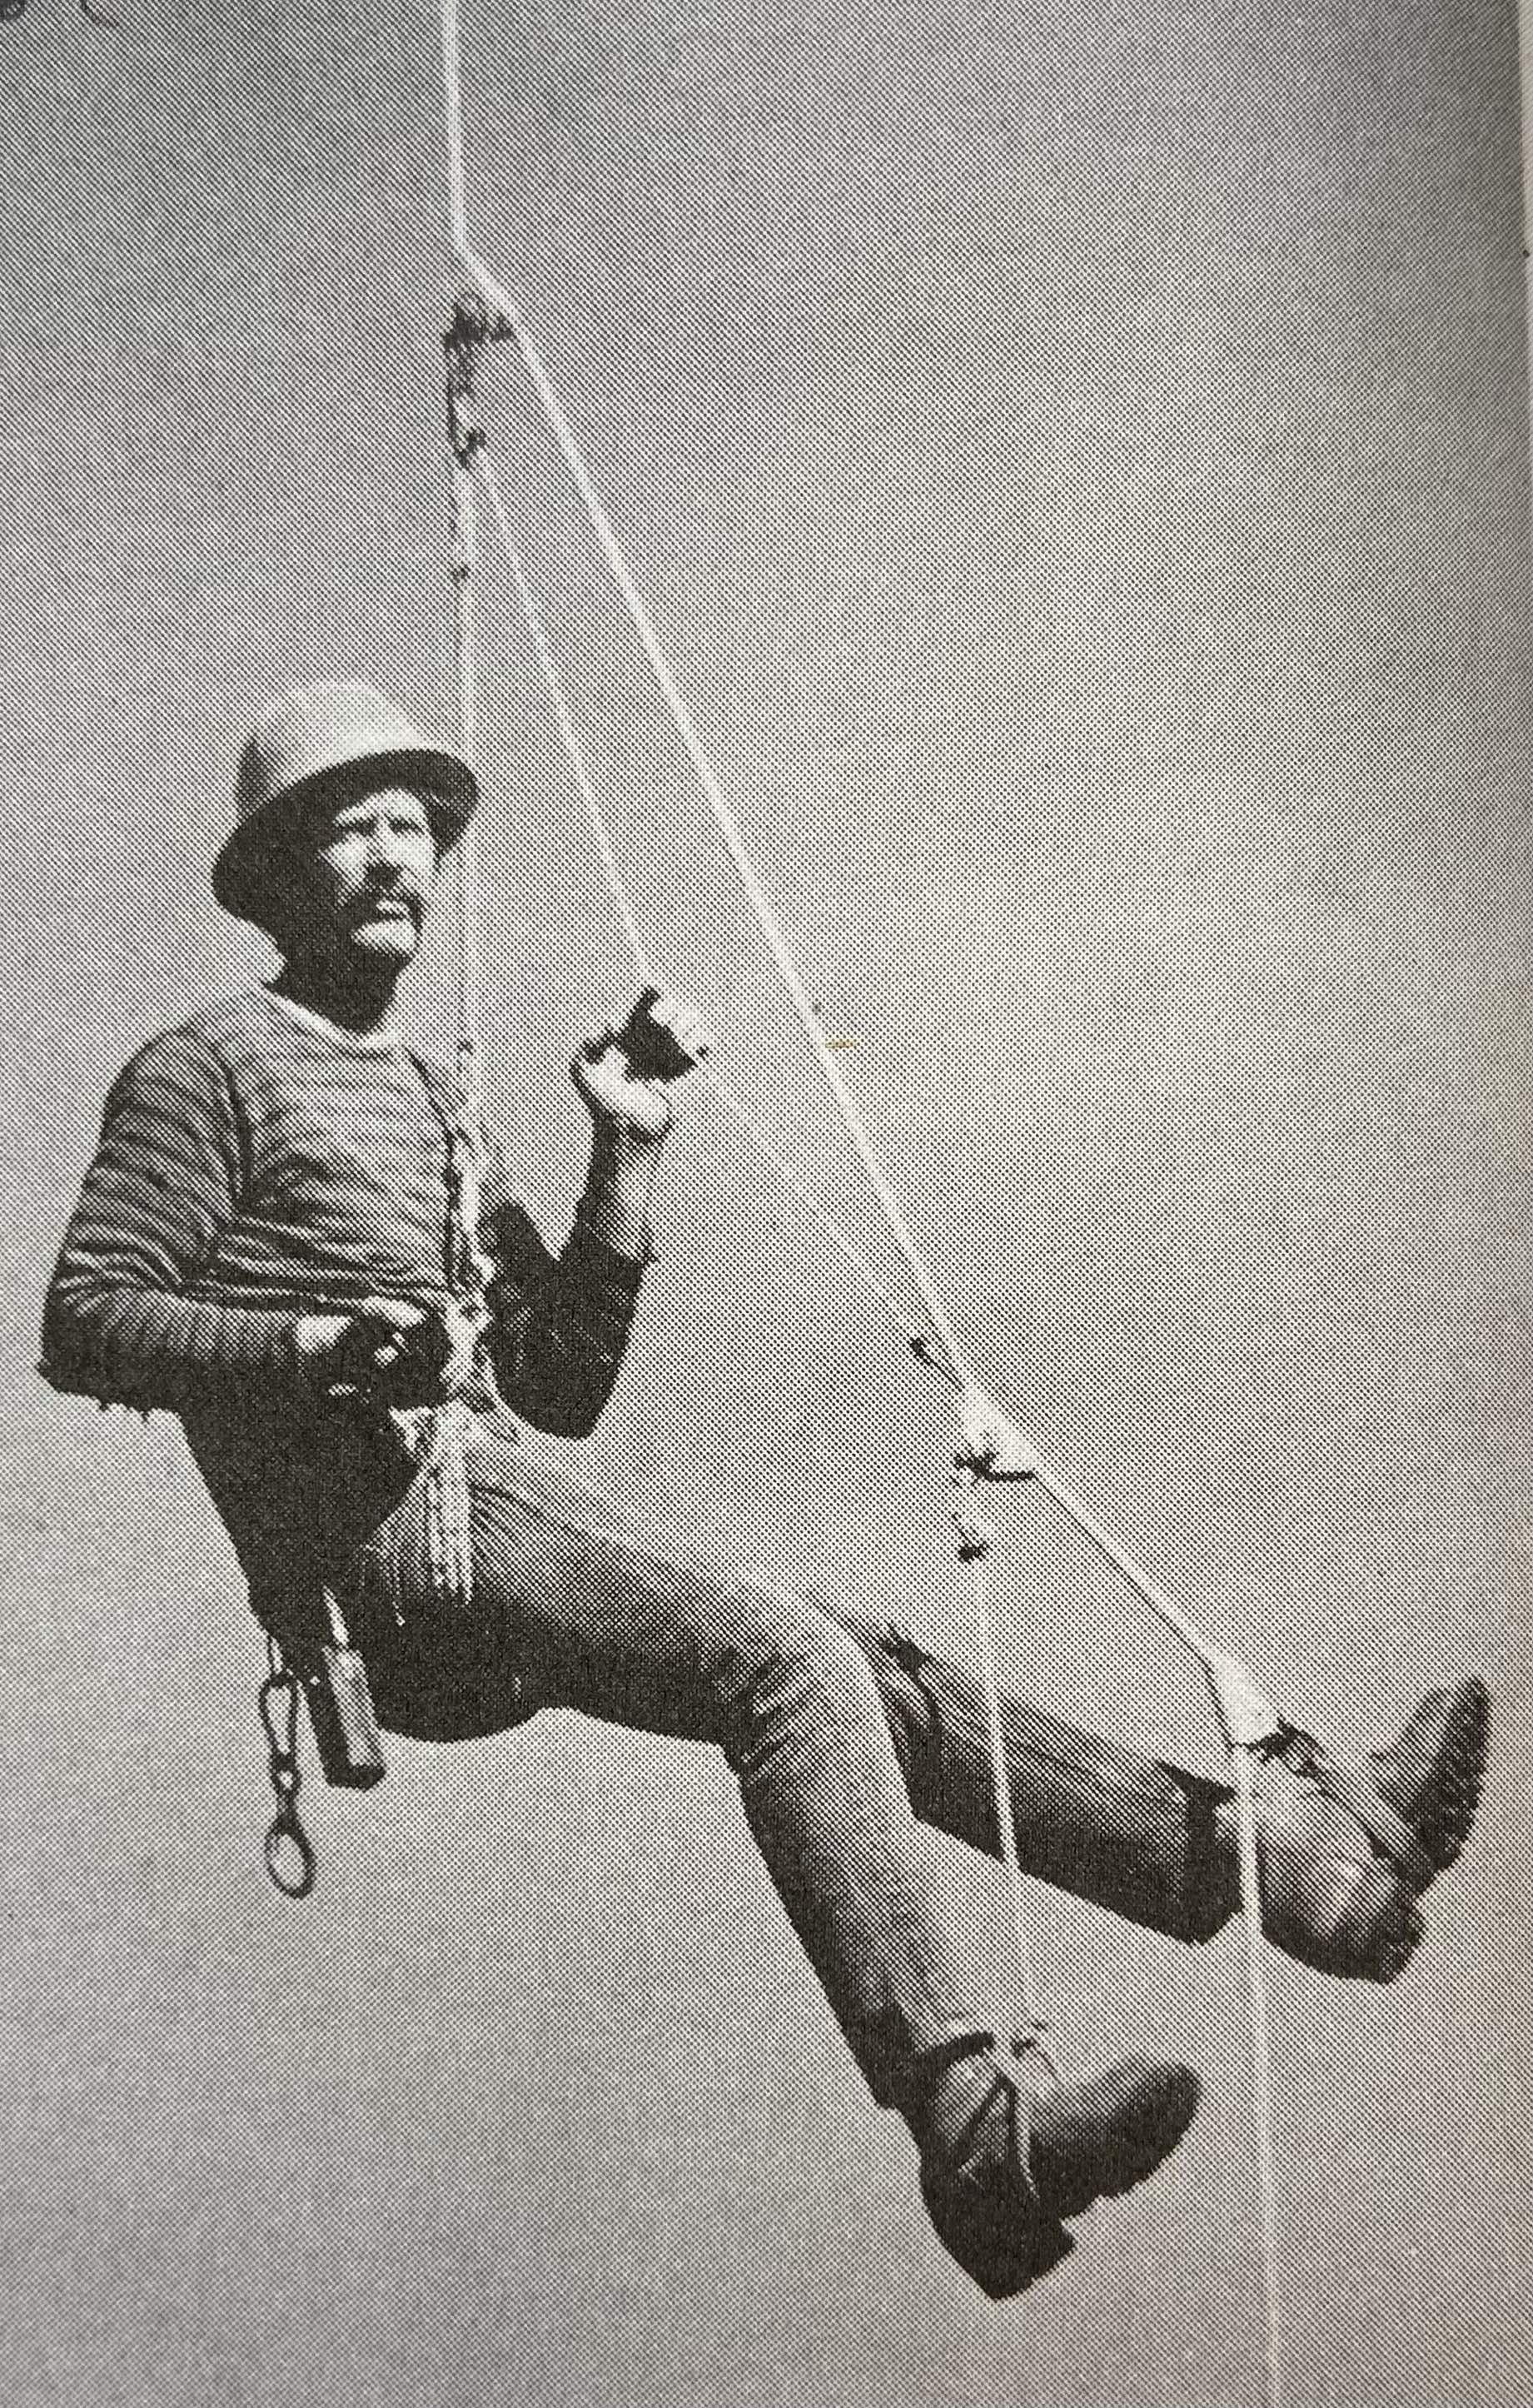
As you see in the above photograph, an Arborist always moves away from a vertical hanging position, and in doing so the rope system needs to slide to either side of the body. Most modern harnesses have a rope or webbing ‘bridge’, but it was not always this way. The American lineage came from High Climbers. West Coast America, using spurs and a flipline to climb up huge trees, in order to set high-line blocks, or knocking out tops for felling. It was an up and down motion that at first was done with a loop of rope passed around the climbers waist. Human ingenuity in the land of cowboys took them to then use parts of a horses saddle. They first wrapped this around their waist and then tied the rope to it. One step toward comfort and the other to safety. The design language of the American saddle was born.
Tree Buzz member
“ Old school West Coast Belts (they were not ‘saddles’ at this point) came out of high lead logging, Super minimalistic. Often times the flipline (about 3/4” natural fibre three strand rope) went through the belt with a single eye splice, as an endless loop configuration, and adjusted with a ring or rigging plate. ‘Side D’ rings came later, along with climbing lines. A ring and a clip was added to hold an axe and handsaw. Granted this was entirely up and down tall conifers, with long tree gaffs. There was no need for a second attachment due to the fact there was no need to pass any limbs. (Safety wasn’t much of an issue back then). A ring and clip was plenty to tie a climbing line or lowering line to. With the only other equipment being a chainsaw and handsaw. The ring is pretty much for clipping the bitter end of the saw lanyard and clip for short hauling the saw. The old school belt was used with spikes and a thick rope flipline, so the climber would spike up, cutting the branches as they went, cut out the top, then spike back down. As tree work began to change and trees were accessed to remove only parts (pruning), the climb line became useful and leg loops were added to the ‘West Coast Belt’. They were mostly all home made from rope and horse tack. ”
Hap Johnson
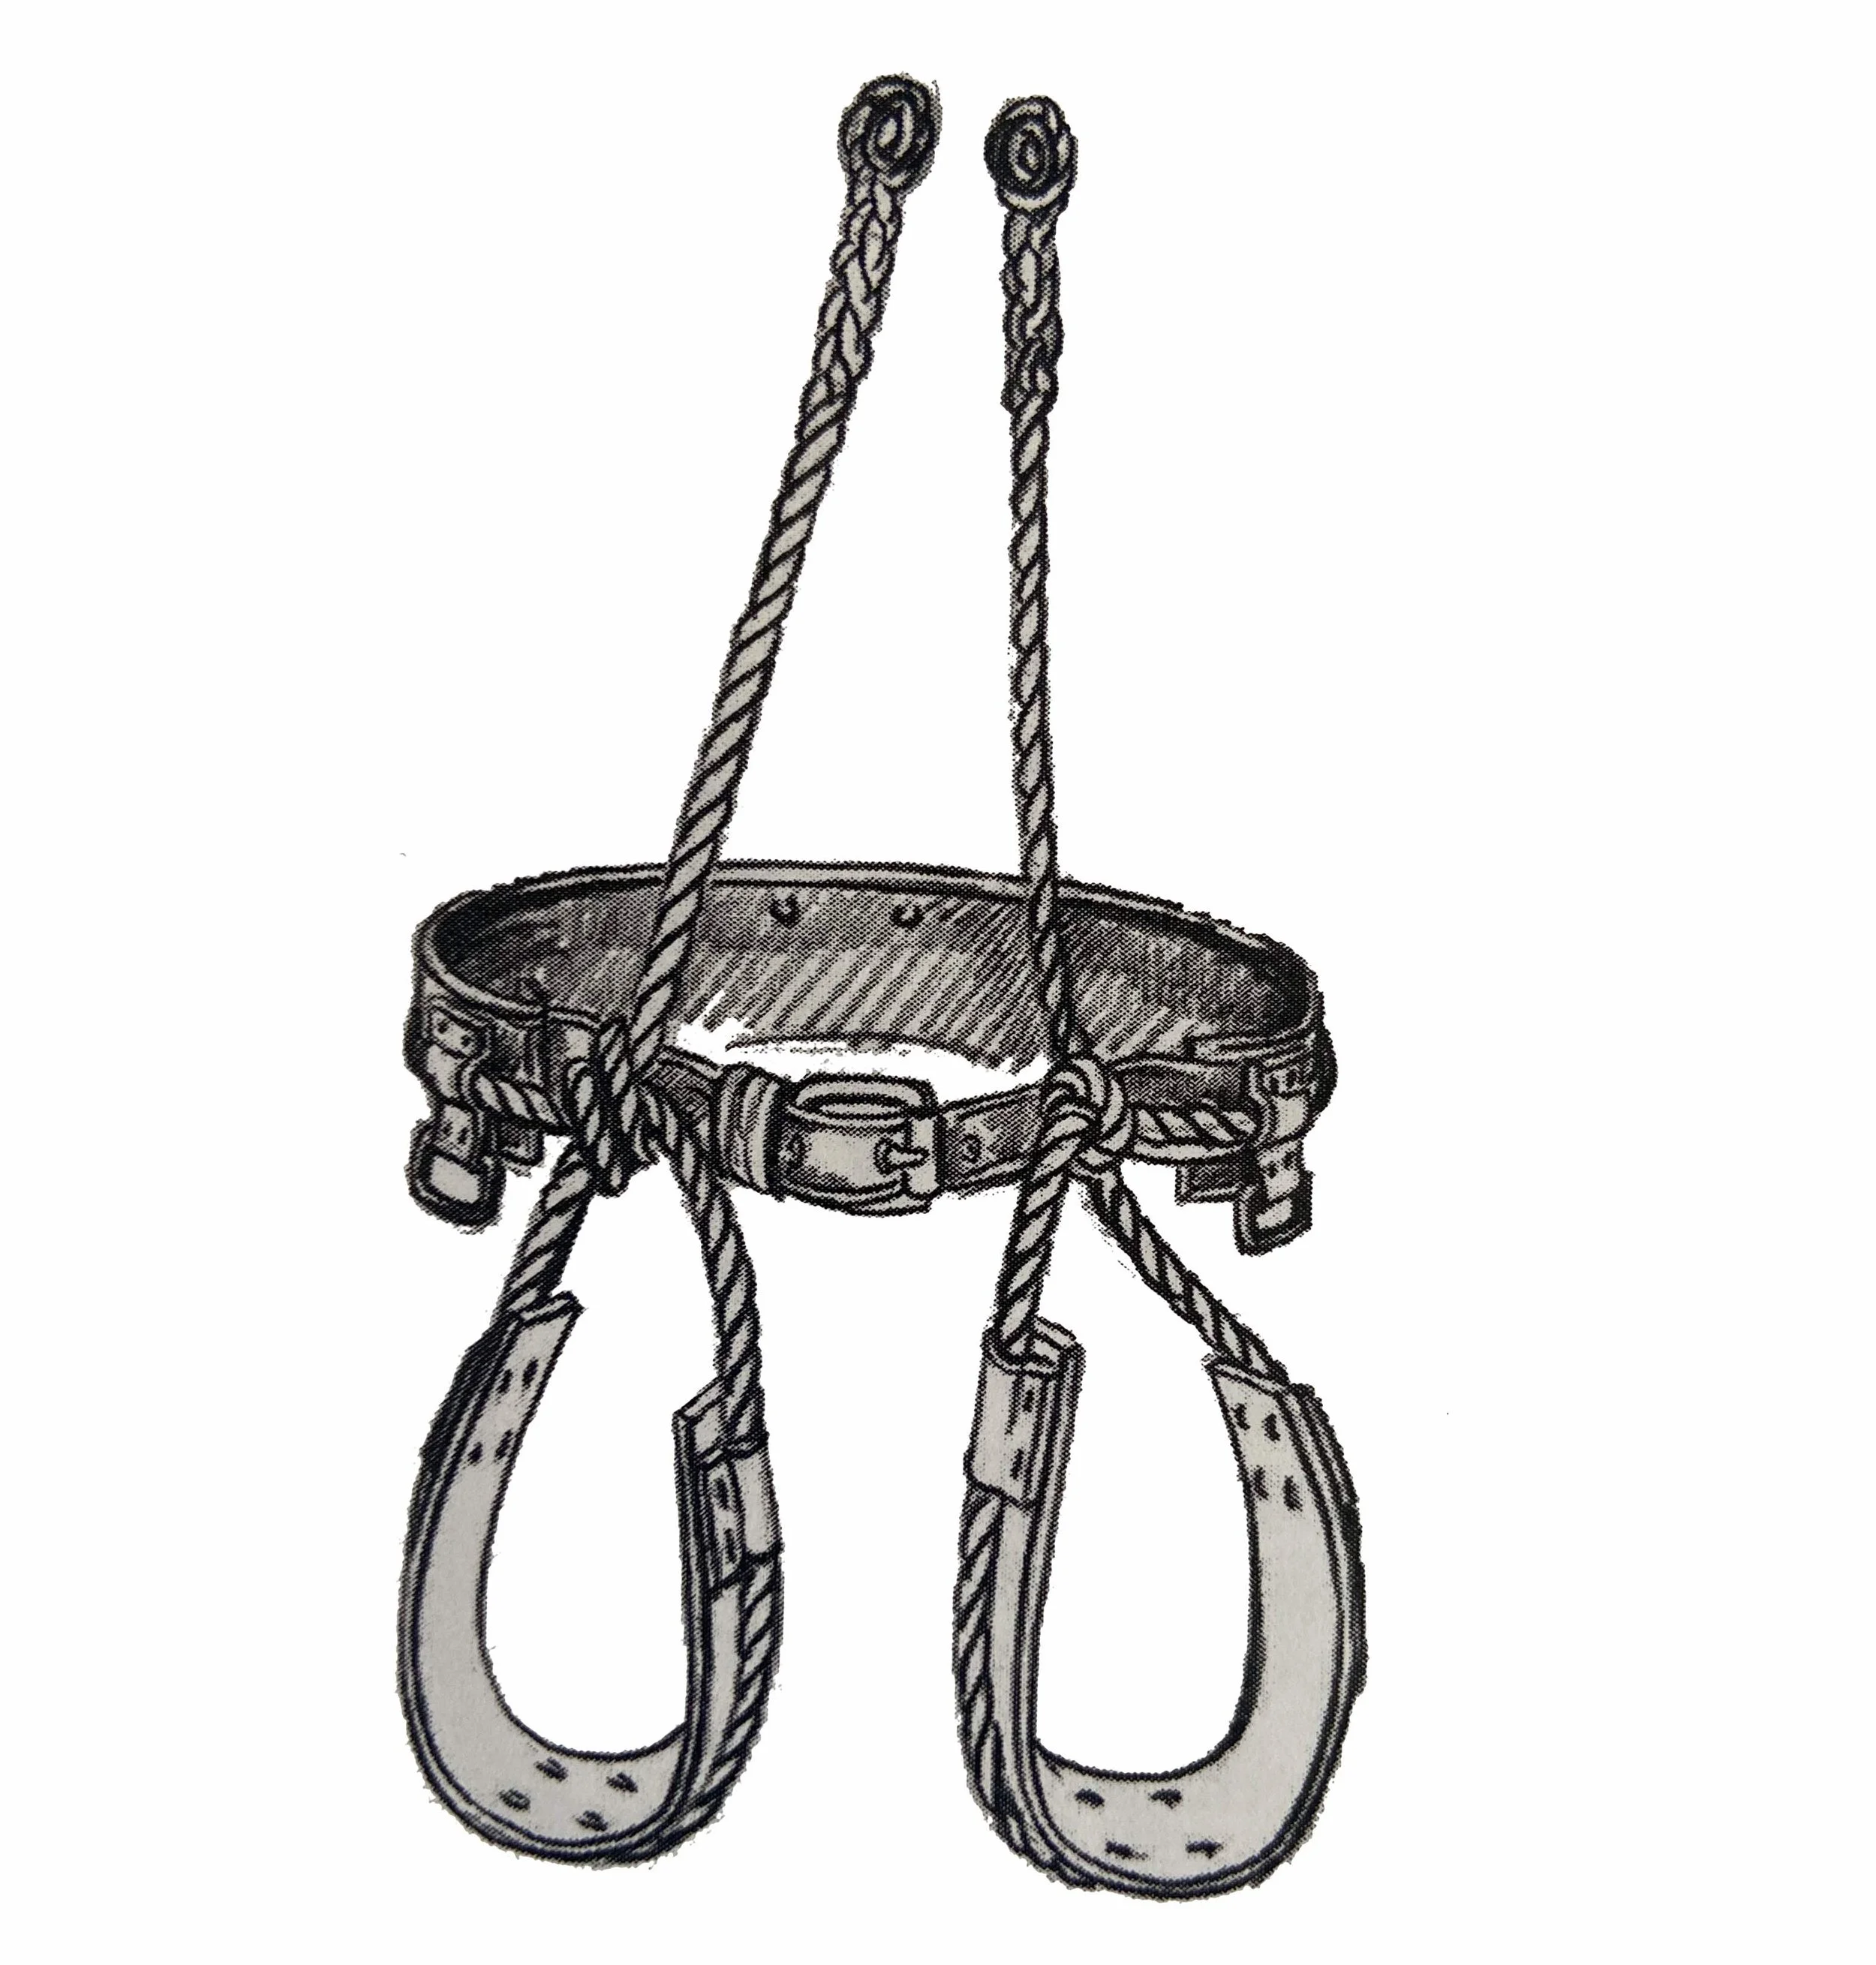
The West Coast Belt, worn around the waist, with rope tied to metal components on each side (Side D’s). Thick hemp, 20mm, tied directly. Climber needs slack in the rope to ascend, occasionally shortens the loop by slackening and re-tying at the harness. Simplicity personified. Hap Johnson was a legend of American west coast high climbing, check out the video below…

G.F. Beranek
“Since tree climbing and the work associated with it is so specialized, I have always advocated the use of custom—made belts. The fit is so much better on a custom belt and they often lack the buckles and adjustment that create the hard spots you find in the production belts. You can also outfit them with quality accessory snaps and rings, and arrange the belt to your liking.
The material best suited for any good climbing belt is rope. It’s affordable, easily obtainable, and can be knotted, woven, or braided together in countless different fashions. Rope construction does not necessarily require any stress point riveting or stitching common in nylon web construction. Thus, the stress points in rope construction don’t pull apart or wear out before the actual material does. Rope is also extremely long lasting; a climber can expect decades of use from a custom rope saddle. (As long as they don’t grow out of it.) There are so many different ways you can build a rope saddle it would be impractical to try and describe them here. All it takes to make a custom-made belt is the basic hardware and accessories and a little rope. The rest requires a little imagination and desire for something of quality. The type of hardware I use is of my own forged and welded variety.”
As the industry of Arboriculture developed in the 50’s, so did requirements for maintenance tree care, pruning and the removal of trees in built up areas. It meant that climbers would need to access the outer tree canopy. Not only fall restraint, now work positioning become a priority. Design began to accommodate this, leg loops became popular. Gerry Beranek describes four types of saddles in his ‘Fundamentals of Tree Work’ book. Back belts, Butt belts, Seat saddles and Leg saddles. Here is an excerpt from pg.85, describing how to make a custom ‘belt’ (leg saddle)


————————————————————————————————————————————————————————-
In the 1940’s Karl Kuemmerling created a leather belt and leg straps, which had loops riveted to the back and leg pads (tunnels), to run the rope through. This allowed climbers easy access to making custom saddles, they simply rigged whichever rope in whatever style and hardware combination of their choosing. One can only imagine that as safety became standardized, these idiosyncratic saddles fell out of fashion. An art became lost in a modernizing world. For those curious of this style and era of saddle, you may be interested in the Valiant, which is a modern take on an old style custom-belt, designed by Matt Cornell and sold through Endors in the US.

Karl Kuemmerling saddle

Valiant back and leg pads

Paul Poynter's custom Valiant

A M E R I C A
Even though leg-saddle-with-bridge proved relevant and popular, Gerry Beranek’s four descriptions, Back belts, Butt belts, Seat saddles and Leg saddles, are still mostly all available at Weaver.
Modular saddles are made up of back pad and separate leg loop/butt strap combinations. There is an interesting selection at Blairs Arborist Equipment, all parts are fully rigged, with pad and strap, climber chooses which to pair with what. Also of note, the Bry-Dan, a positioning and fall arrest saddle, designed by Ed Hobbs in the 1970’s, is also available. Check the homepage here.
Arbormaster and Buckingham have been creating classic timeless designs for over twenty years, and have a wide variety of modern saddles. For me, American saddles speak of simplicity and strength. The Side D is large and there is always a dog snap and ring to hang cutting tools. There is much more to speak of in American harness history and design, but we will move the conversation to Europe.

Weaver WLC-100 saddle, back section (belt) with large ‘D’ rings, without leg straps. Climbing system connects to ‘D’ rings on the butt strap. Left and right side on the belt have a small clip and ring, for handsaw and chainsaw. Tongue Buckle waist closures are easy to use and comfortable.

Bry-Dan harness
E u r o p e
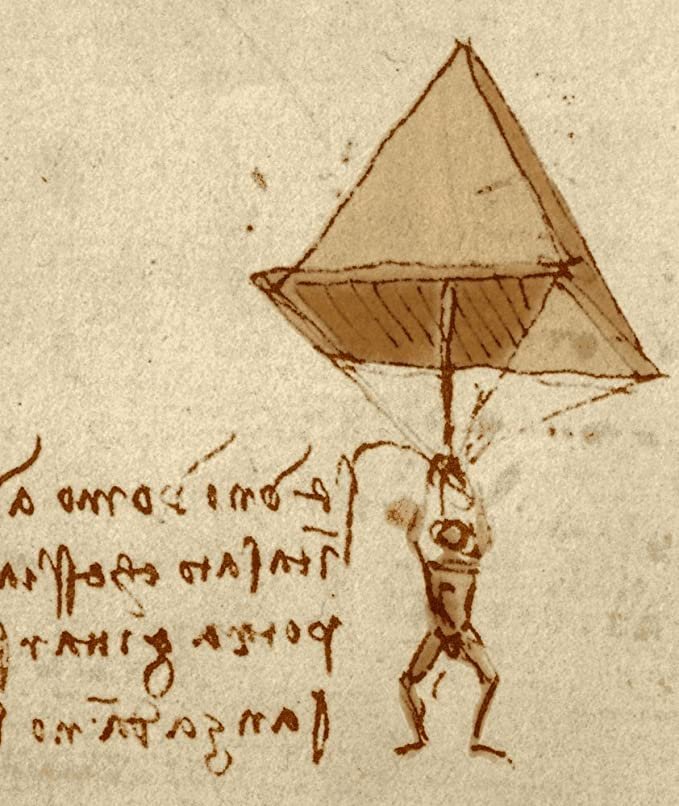
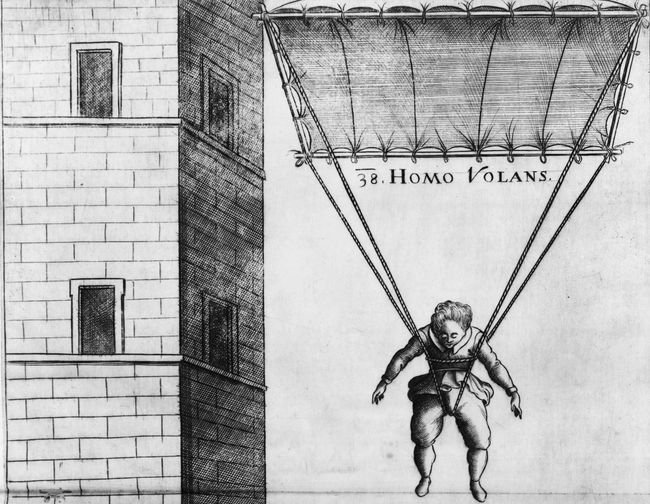
Early European design was influenced by Air Force parachute harness’. Materials began with cotton and post-war changed to nylons and then polyester, with wide flat webbing, as opposed to the American model of leather and rope.
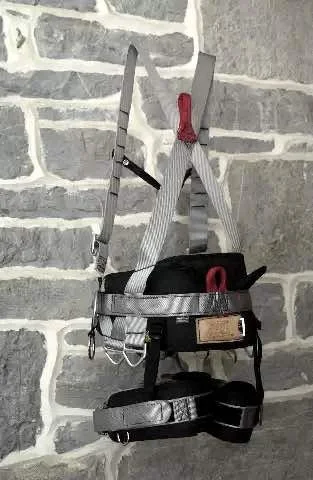
A UK design, the Willans ‘T24LE OFF SHORE Fullbody’, a mixture of parachute harness with bosuns seat and leg strap is lightweight and high strength. It has small side ‘D’ rings, which are used with karabiners, rather than tying the rope directly to them (as seen in the YouTube video above).
The Willans T22 (made in 1994) Arborist sit harness has a bosuns seat with thin leg loops. It takes the worst elements of American design, with non of the positive. Truly a monstrosity, and painful to boot.
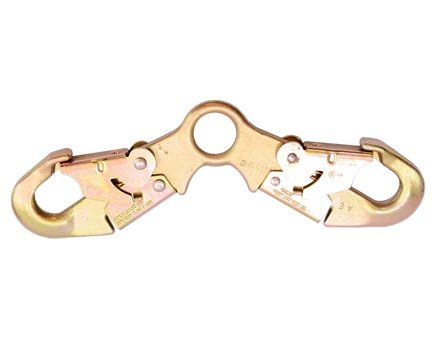
A bridge, which allows the climbing system to attach near to the climbers centre of gravity, and float from side to side, also relieves pressure at the hips. Butt strap and bosun style design pulls material sideways into the hips, crushing the legs together. The Willans has two triangular shaped stainless steel links, held together by a steel link. The Americans worked out that if this point were able to be held open, the climber receives much less torture. Pain from the harness pinching at the hips is alleviated with Spreader Bars. The Spreader Bar hooks attach one to each side of the harness, then climbing system clips to the hole at the centre. It stops the butt strap from pressing the hips together, giving some relieve from this tortuous harness design.
Next time you are climbing you can experience this relieving sensation on your bridge style harness too. Attach one system to the bridge and hang vertically. The shorter the bridge the more pressure is put into your hips, and vice versa, a longer bridge relieves pressure. When you add in a second system to the same bridge, and hang from opposing points, the bridge forms into a horizontal shape and pressure relief is pronounced.

Historical parachute harness

T24LE OFF SHORE Fullbody

Willans T22
A Spreader Bar creates relief to hips and thighs
Opposed suspension on bridge creates relief to hips and thighs
T r e e A u s t r i a
The long story of a tree climbing harness (from Drayer’s homepage)
The development of the first treeAustria tree climbing harness already started in 1998 in Austria. It all started with an idea by Franz Kreuzeder. He was known in Austria for a long time in the field of forestry education. But his interest and passion shifted more and more in the direction of tree care.
At that time, there was very little special equipment for arborists, and of course the climbing harness is the central part of a climbing arborist's equipment. He took the widely used belt from Don Blair and developed it further. The biggest difference was the used material. The harness of Don Blair was made of leather and therefore very robust and durable but also heavy and inflexible. So the leather was completely replaced with textile materials. The result was one of the first lightweight and functional tree climbing harnesses available in Europe. The treeAustria 1 was born.
After a few self-made prototypes the production process was entrusted to the Haberkorn Company. This made it possible to have perfect quality and expertise right from the start. Now only someone was needed who had the opportunity to sell the new harness worldwide. And the first thought was one of the pioneers of the tree care business Friedrich Drayer.
From this cooperation and an idea finally a small revolution emerged and after a short time one of the best-selling tree climbing harnesses on the market. This was the beginning of a long history of continuous development and improvement of the treeAustria and it continues until today.
Another unique selling point at the time was the posibility of attaching a seat board and a chest strap. That significantly increasing the flexibility and bandwidth of using the treeAustria.
In the following years until today, permanent and tireless work was done on further development. Many ideas, also from some friendly arborists, were implemented or discarded after extensive tests and many climbing hours.2004 followed the first big update with the treeAustria 2. Among other things, there were now additional attachment points for the lanyard, the connection from hip belt to leg loop was now infinitely adjustable in length and instead of the large sliding D now an aluminum ring was used on the central band. This allowed the harness to be used more flexibly and the better adaptability made it even more comfortable.
2008 the next version was the treeAustria 3. The focus in the development was on the connection point of the hip-leg connection and the central belt. This should be more flexible, so that the harness could better adapt to the respective climbing position. So far, it was sewn firmly, but from now on a D ring was used at this point and thus significantly improved flexibility.
2010 the next development took place with the treeAustria 3.1. To further improve wear resistance and customization options, the D rings have been replaced with shackles as a connection point. From now on, it was always possible to exchange the heavily stressed central belt or to install other lengths. The lifetime has been greatly increased by this possibility.
2014 the current treeAustria 3.2 followed. Over the years, Friedrich Drayer was more and more involved in the development. The 3.2 was finally developed completely by Drayer and Haberkorn together. He got larger and more comfortable leg loops, more standard attachment points and infinitely adjustable hip-leg connections. This makes the treeAustria 3.2 one of the best tree climbing harnesses on the market for years.
2021 was a very exciting year for us. We are all the more pleased to be able to say that the treeAustria Pro is the best of 22 years of experience, combined in one arborist harness. Excellent wearing comfort was the focus of development right from the start. We have completely revised the geometry and improved the weight distribution.
Aluminum rings now provide the connection between the hip belt and the leg loops. In order to have even more options, a second bridge can now also be installed. We also attached great importance to the packaging. It should be as environmentally friendly as possible. That's why we spent a long time looking for what we felt was the best packaging.
The result was that the treeAustria Pro arborist harness has no packaging at all. Instead, a stylish gear carabiner is included that holds the arborist harness together. A "packaging" with added value.
Throughout all the changes the Tree Austria models maintained lightweight materials, large side D rings and for the most part suspender capability.
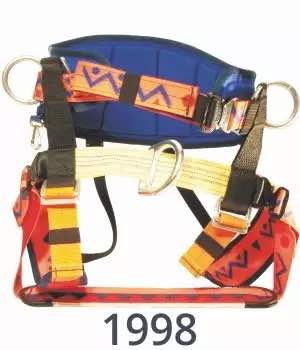
1998

1999
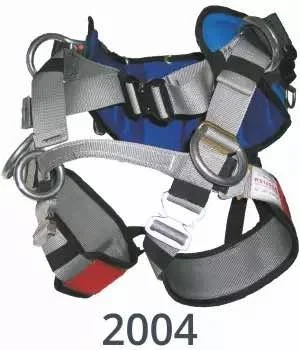
2004

2008

2010
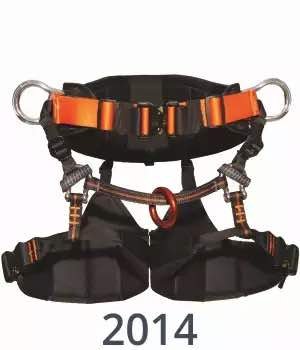
2014
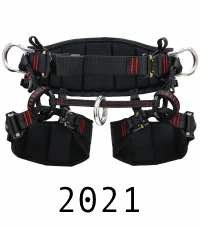
2021

In 2005, when I started to climb, the typical modern harness had:
Back pad and leg loop design
Relatively wide leg pads and back pad
Adjustable webbing on lower (legs) and upper (waist) side of the bridge
Replaceable bridge
European Side D rings tended to be smaller than American
Means to attach the lanyard to either side of the bridge (lower D or shackle)
A variety of racking options
Lightweight
Life span of 5 years
Adjustability of the bridges lower and upper attachment webbing is now ubiquitous. If the climber needs to have a more upright position, then the upper webbing is shortened. Typically, a harness set up for pruning should allow the climber to get in a more horizontal position. Crane work requires less stretching movement, so the harness can be set up for the climber to have a more vertical position while at rest. Everybody’s body is different, and this adjustment is important to create comfort, and to get the most out of your harness.
T r e e M a g i c
In the 2000’s, Edelrid and Hubert Kowalewski (ART) made a harness called the Tree Magic. It had adjustable leg loops, adjustable waist loops, a replaceable floating bridge. In my limited knowledge, the Tree Magic brought together the most pertinent design language of several decades and created a timeless design. It didn’t have suspender or fall arrest options, those were addressed in Edelrids next design, the Tree Core. This has tinges of nostalgia attached, but it became a classic design, that many climbers wish was still in production. It had two iterations, which saw the side D and floating bridge D get smaller. Presumably as more emphasis was put on rope climbing techniques, rather than the American lineage of Spur climbing.
T r e e m o t i o n
Combining forward thinking ideas of replaceable parts, custom racking options, comfort, advanced positioning and configuration capability, the Treemotion has been a best seller for all kinds of climber. It has several European certifications attached and adheres to ANSI requirements. The original ‘Standard’, was so forward thinking, it hasn’t been taken over in design for nearly two decades, not even by its own numerous iterations. The modern and ubiquitous Lower D suspension point and techniques associated with it, stem from the original Treemotion. Don’t forget, the Treemotion also sits in a historical lineage. Can you trace where its design came from?

Tree Magic #1

Tree Magic #2 (top),#1 (bottom)
Treemotion 'Standard'
Treemotion 'Lower D'

POSITIONING AND SUSPENSION
Todays sophisticated positioning ideas mean that more than one system is used and connected at the bridge. As one, two, three and sometimes four systems converge to one point, it is important to configure properly and ensure that items do not cross-load and potentially become a dangerous nuisance. As far back as Gerry Beranek’s custom-made saddle, climb lines were attached to a floating element on the bridge. Apart from Petzl, all bridge style harnesses are sold with an aluminum or steel ring on the bridge. And all beginner tree climbers are taught to attach the climbing system to it, using the side or lower D for the lanyard. Safety begins with simple instructions, and as the climber progresses, the work and work positioning becomes more complex. The lanyard will often be reset to the bridge and gives more freedom of movement to the climber.
Double bridges are becoming common, and most climbers will have at least one swivel on them. The choice of ring and swivel has now been superseded by complex tri-movement swivels. Understandably these are not to the appeal of all, especially those that like to KEEP IT SIMPLE (sometimes at the detriment of efficiency). For technical climbers (like me), who now approach every climb with two climbing systems, the appeal of three swiveling points is key. Here are some alternatives...
DMM Link It, with Nexus Camp GYRO3 Swivel on device swivels
DMM’s Link It series can be built up in a number of ways. The central (black) link comes in three shapes, and the swivel series offers a multitude of options. The bridge may be passed through the shackel (grey), then devices attached to the other two swivels (green). Aluminum is soft, which increases friction as the climber moves from side to side. Not a large concern but neither is it ideal as it will cause premature wear on the swivel and bridge. Personally, I try to use a steel interface at the bridge, for increased smoothness and wear longevity. The Link It configuration really is superb in keeping systems well aligned. Highly recommended.
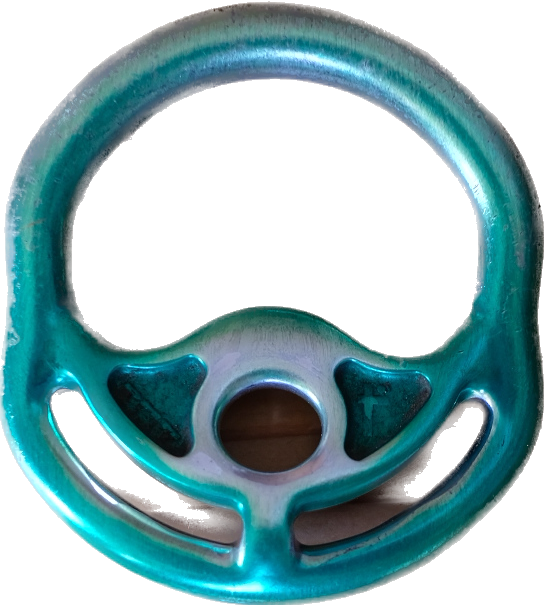
GYRO3 uses steel. It is small, which may cause karabiners to clash. It is a well made and less expensive option than the DMM Link It.
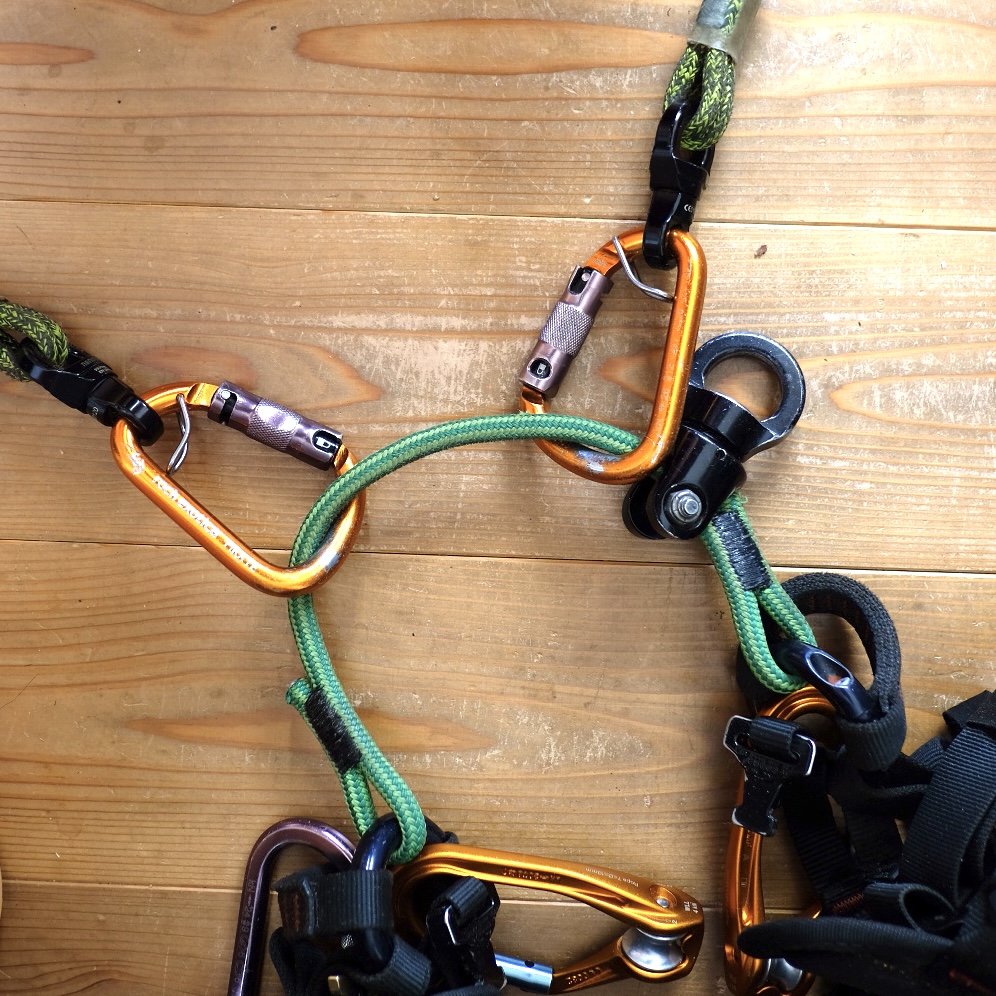
Swivels on devices, especially mechanical devices, always help to keep things aligned and in good position for use. With swivels rope tends smoothly into the device, increases efficiency and lowers fatigue. This last example shows a large Rock Exotica Shackle swivel(with steel pin) on the bridge, and two small Rock Exotica Nano swivels, one on each device. There is some clashing between the karabiners, as they are both attached to the same point, but for the most part it is manageable.
Thank you for reading the article.
If you have any questions please direct them to ODSK or my personal homepage.

DMM Nexus swivel and Link It

Camp GYRO3
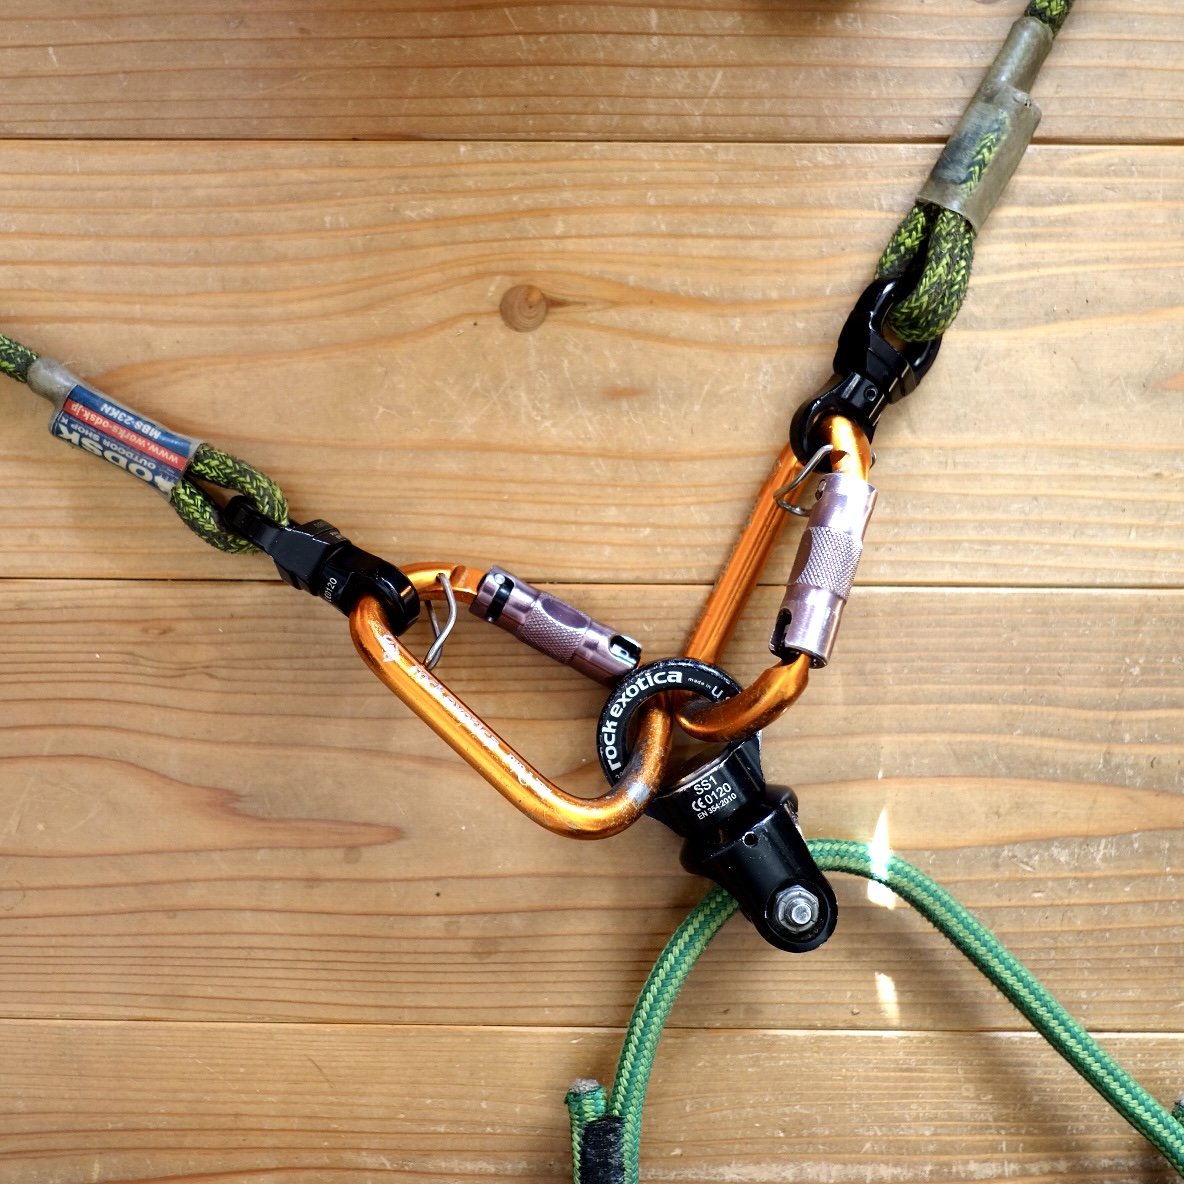
Swivels on bridge and device